End-to-End Python Version and Package Management using Pypenv, Pipx & Pipenv
Have you ever spent countless hours trying to figure out python versions and dependencies for your projects? If this is you, then read on! In this post we will look at three different tools that work seamlessly together to setup a clean and simple Python development environment.
The Problem
How can we effectively manage python libraries, packages and modules? Oftentimes, its a very confusing process which if not done properly can overtime result into something as dreadful as shown below.
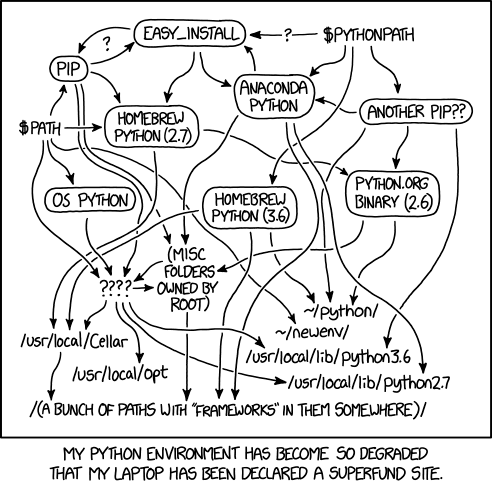
Source: https://xkcd.com/1987/
So before looking at the tools that could potentially help us avoid the above mess, let’s identify the different use cases that we need to address. At at high level, we need some mechanism to deal with the following:
Python versions: We need to know the version of python we are using for our project. Overtime we may need to run multiple versions of python for different projects and dependencies.Global dependencies: We need a way to manage global dependencies that are available system-wide and can be shared between different projects.Virtual environments: With every new python project, we need to create a virtual environment to isolate our project dependencies from the rest of the system.
The Solution
Unfortunately, there is no one tool that single handedly accommodates all the above mentioned requirements to a satisfactory level. However, using a mix of tools like Pyenv, Pipx and Pipenv we can definitely meet our requirements end-to-end as follows:
Pyenv: install multiple Python versions, each of which can be scoped at a global or local levelPipx: install Python applications that can be run from the command linePipenv: install virtual environments and dependencies specific to your projects
Pyenv
Pyenv is a tool for managing Python versions that can be scoped to local (project directory) or global (system-wide) levels. It’s essential to note that Pyenv is great at managing different Python versions, however, it is not a virtual environment manager unlike Pipenv, which we will see later.
The installation is fairly straightforward for macOS as shown below. Refer to the Pyenv GitHub for install instructions for Linux and Windows.
# install on macOS using homebrew
brew install pyenv
A few useful commands:
pyenv versions: list all the installed Python versions in the systempyenv install --list: list all available Python versions that can be installedpyenv install <version>: install a specific version of Pythonpyenv global <version>: set an installed version as global to be used at the system-wide levelpyenv local <version>: set an installed version as local to be used at the directory level
Pipx
Pipx is a tool to help you install and run end-user applications written in Python. It’s closely related to Pip. In fact, it uses Pip, but is focused on installing and managing Python packages that can be run from the command line directly as applications.
Also, you would not typically use Pipx to develop or publish your code packages. The common usage of Pipx is around consuming the already published packages like black, flake8, cookiecutter, etc. that are typically a one-time install and can be shared across multiple projects.
It has two main commands:
# install applications globally and in an isolated environment
pipx install <package_name>

# run (no install) the latest version of a Python application in a temporary environment
pipx run <package_name>
Lastly, Pipx can be installed using either brew or Pip depending on the OS. And this is probably the last time you would use Pip, since every other package from here onwards can be installed using Pipx and Pipenv.
# install Pipx using brew on macOS
brew install pipx
pipx ensurepath

# install Pipx using pip on Linux
python3 -m pip install --user pipx
python3 -m pipx ensurepath
Pipenv
Pipenv helps create virtual environments and also fetches and installs Python packages. It generates a Pipfile that contains project specific packages and Python version requirements alongside a Pipfile.lock file to lock all the required dependencies. The Pipefile is similar to the requirements.txt which is typically used with Pip, but it contains more information about the packages and their versions.
At first, let’s look at how to install Pipenv. We can either use Pipx or brew to install on macOS. Refer to this documentation for information on installing Pipenv.
# using pipx
pipx install pipenv

# using homebrew
brew install pipenv
Pipenv uses the following commands to install a virtual environment and its dependencies specified in the Pipfile. It would simply create a blank virtual environment if no Pipfile is found, which usually is the case when starting a new project.
# install a virtual environment (based on <dir_name>) and its dependencies
pipenv install

# for activating the virtual environment in the current shell
pipenv shell
Now that we understand the above mentioned tools, let’s look at the workflow using a basic example project.
Example Project Workflow
At first, let’s verify the installed versions of Python in the system.
pyenv versions
Below is the output for the versions of Python that are currently installed in my system. As you can see, we have two different versions - the system version that comes preinstalled and is currently the default (*), and the 3.9.0 version that was installed at some point using Pyenv.
* system
3.9.0
Next, let’s create an example-project directory.
mkdir example-project
cd example-project
We will use Pyenv to set the local Python version to 3.9.0. Doing this will associate the example-project directory with Python 3.9.0, so here onwards calling Python from within the example-project folder will always refer to this specific version of Python.
pyenv local 3.9.0
Now we use Pipenv to create a virtual environment and install the required dependencies specified in the Pipfile. Note that since we don’t have any Pipfile yet, Pipenv will simply create a blank virtual environment and then install the specified packages. For this example, let’s create a virtual environment installed with pandas.
Moreover, by default Pipenv doesn’t seem to respect Pyenv’s global and local Python versions, therefore it’s important to specify the python version explicitly as shown below.
pipenv install --python 3.9.0 pandas
The above command should create a virtual environment and generate a Pipfile. We can check our Pipfile to see the exact specification of our installed packages.
cat Pipfile

[[source]]
url = "https://pypi.org/simple"
verify_ssl = true
name = "pypi"

[packages]
pandas = "*"

[dev-packages]

[requires]
python_version = "3.9"
As we can see, the Pipfile specifies the source of our packages and the version number. The * here simply means that by default it will install the latest version of pandas. Lastly, it also specifies the exact Python version.
As a last step, we need to activate the virtual environment before starting the work on the example-project.
pipenv shell
And that’s it! We now have a clean way to manage python versions and dependencies in our project.
But what about Pipx? When do we use it in the workflow? Well, as mentioned above, use Pipx to install and run end-user applications from the command line.
Let’s say we created a bunch of python files (.py) in our example-project directory and want to install and run a python code formatter tool like black. This is where Pipx comes in handy since we don’t want to install black in our virtual environment to make it globally available for all the other python projects as well.
Clean-up
To remove the virtual environment, simply run the following from the example-project directory.
pipenv --rm
And then delete the project directory itself.
cd ..
rm -r example-project